Table of Contents
The possibilities for on-premises cloud servers are constantly expanding thanks to Nextcloud. With the aid of a comprehensive UI overhaul, Nextcloud’s most recent update partially refocuses attention on digital well-being. Improved Talk, a more efficient email client, better contact management, increased personalization, increased accessibility, significantly enhanced apps, an integrated photo uploader and editor, AI-powered face and object recognition for uploaded photographs, and more.
The interface is what stands out the most about Nextcloud 25. To make the site far more user-friendly and contemporary, the designers and developers have truly gone above and beyond. As usual, there are a few different ways to install Nextcloud. Nevertheless, I would prefer to install it on Ubuntu Server 22.04 using the conventional method.
What you’ll need to install Nextcloud 25
To install Nextcloud 25, you’ll need a running instance of Ubuntu Server 22.04 and a user with sudo privileges. That’s it.
How to install the necessary requirements
The first thing you must do is install the web and database servers with the command:
sudo apt-get install apache2 mysql-server -yStart and enable them both with:
sudo systemctl enable --now apache2
sudo systemctl enable --now mysql
Next, install the php dependencies with:
sudo apt-get install php zip libapache2-mod-php php-gd php-json php-mysql php-curl php-mbstring php-intl php-imagick php-xml php-zip php-mysql php-bcmath php-gmp zip -yHow to set the MySQL root password
For some reason, the mysql_secure_installation failed me. Instead, I had to set the MySQL admin password manually. First log into the MySQL console with:
sudo mysqlOnce there, set the admin password with:
ALTER USER 'root'@'localhost' IDENTIFIED WITH mysql_native_password by 'PASSWORD';Where PASSWORD is a strong/unique password.
Exit from the console with exit.
How to create the database and user
Next, we can create the database. To do that, log back into the MySQL console with:
mysql -u root -pCreate the database with:
CREATE DATABASE nextcloud;Create the new user with:
CREATE USER 'nextcloud'@'localhost' IDENTIFIED BY 'PASSWORD';Where PASSWORD is a unique and strong password.
Give the new user the necessary permissions with the command:
GRANT ALL PRIVILEGES ON nextcloud.* TO 'nextcloud'@'localhost';Flush the privileges and exit the console with the commands:
DO 0 -- flush privileges;
exit
How to download and unpack the Nextcloud file
Download the Nextcloud source with the command:
wget https://download.nextcloud.com/server/releases/latest.zipInstall unzip with:
sudo apt-get install unzip -yUnpack the downloaded file with:
unzip latest.zipMove the new directory into the Apache document root with:
sudo mv nextcloud /var/www/html/Grant the proper permissions with:
sudo chown -R www-data:www-data /var/www/html/nextcloudHow to configure Apache for Nextcloud
We now have to create an Apache configuration file with the command:
sudo nano /etc/apache2/sites-available/nextcloud.confIn that file, paste the following:
Alias /nextcloud "/var/www/html/nextcloud/"

<Directory /var/www/html/nextcloud/>
Require all granted
AllowOverride All
Options FollowSymLinks MultiViews

<IfModule mod_dav.c>

Dav off
</IfModule>
</Directory>
Enable the new site with:
sudo a2ensite nextcloudEnable the necessary Apache modules:
sudo a2enmod rewrite headers env dir mimeIncrease the PHP memory limit with the command:
sudo sed -i '/^memory_limit =/s/=.*/= 512M/' /etc/php/7.4/apache2/php.iniRestart Apache:
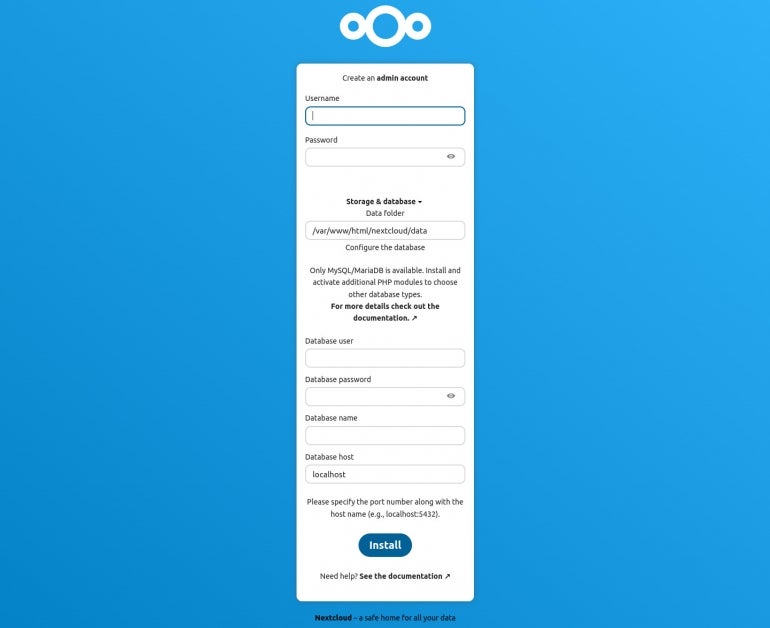
sudo systemctl restart apache2Lastly, launch a web browser and navigate to http://SERVER/nextcloud, where SERVER represents the hosting server’s IP address or domain. The web-based installer should appear and ask you to establish an admin user and fill out the database details (Figure A).

The Nextcloud 25 web-based installer.
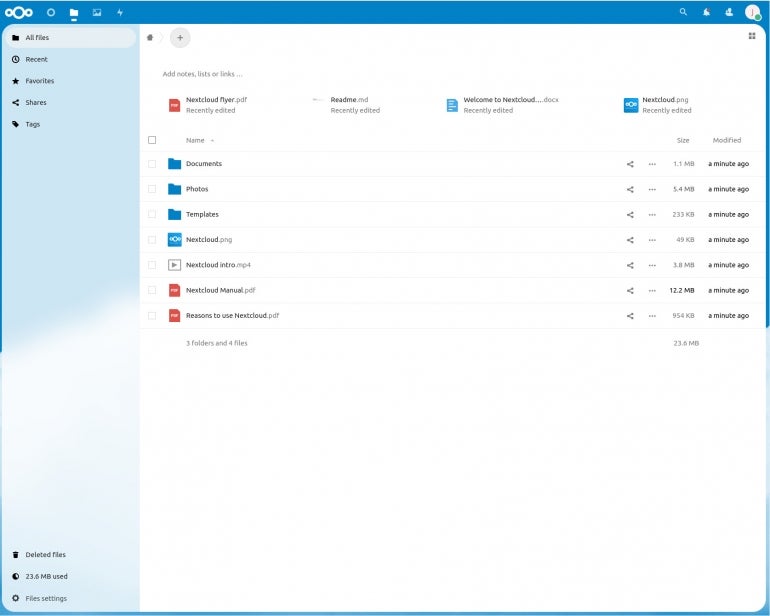
Click Install to let the magic work its magic underneath. After it’s done, you should be logged in as the admin user on the new Nextcloud Hub (Figure B).

The new Nextcloud interface is a subtle, but important upgrade from the previous iterations.
And there you have it—you have just installed the most recent version from Nextcloud’s talented team. Savor the new features and the updated interface.